How to Set Up Motion Zones for Accurate Alerts
Eliminate False Alarms and Focus on What Matters Most
When I first installed my indoor security camera, I thought everything was set. But within the first week, I got dozens of alerts — for shadows, cars driving by, my curtains moving, even my own dog walking by. It was driving me crazy. That’s when I realized: I wasn’t using motion zones correctly.
Setting up motion zones is the secret to getting smarter, more accurate alerts — and reducing all the annoying false alarms. Whether you’re using a Ring Indoor Cam, Wyze, Blink, TP-Link Tapo, Eufy, or another smart camera, the process is surprisingly simple and super effective.
Let me walk you through it step by step — based on what I did myself — and show you how to use motion zones to actually get alerts that matter.

Table of Contents
What Are Motion Zones?
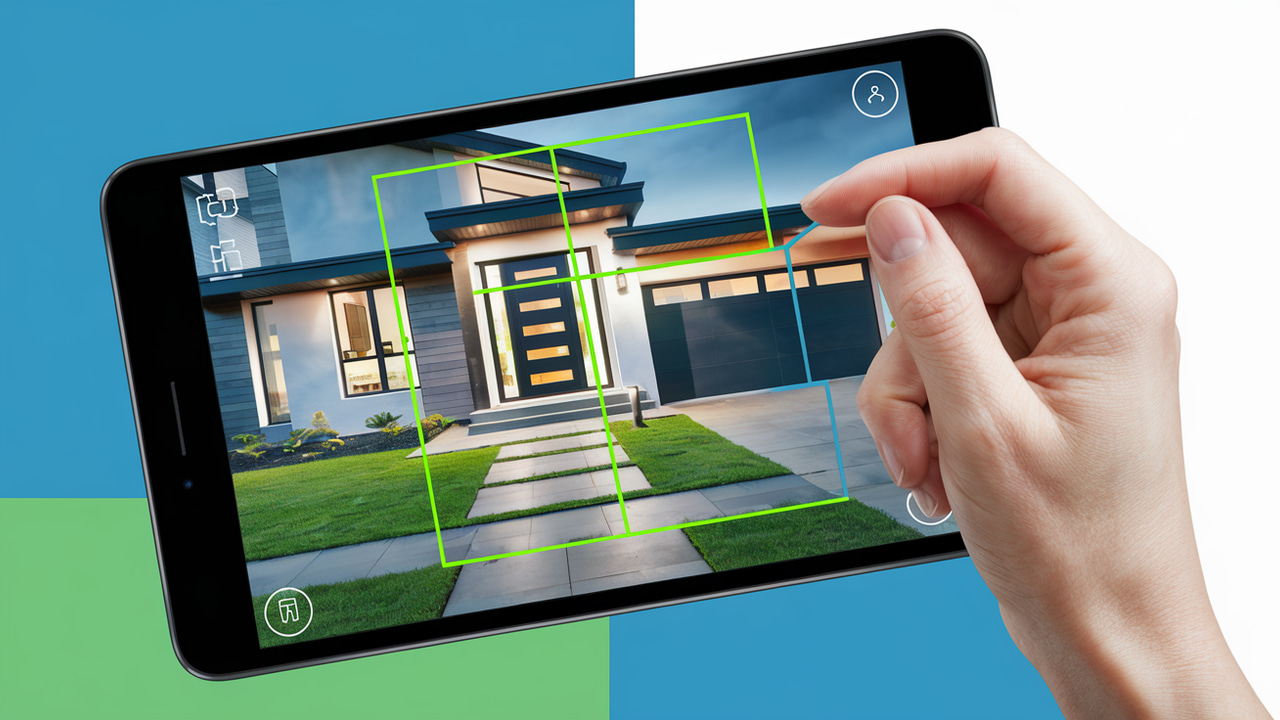
Motion zones (also called “activity zones”) are customizable areas in your camera’s field of view where motion detection will be active. You basically highlight the zones you care about — like a doorway or crib — and ignore everything else.
Most cameras allow you to set these zones right from your phone using their app (Ring app, Wyze app, etc.). You just tap and drag over the live camera view to create or edit zones.
CHECK OUT HERE THE BEST RING INDOOR CAM!
How I Set Up My Motion Zones (Step-by-Step)
- Open the app for your smart camera.
- Go to the Device Settings and find the Motion Settings or Activity Zones option.
- Use your finger to draw or select areas where you want motion detection to happen.
- Example: Just the front door, or only the area around the baby’s crib.
- Exclude unnecessary areas — like windows, fans, TVs, or busy sidewalks.
- Save your changes and test it by walking through the zones yourself.
Some cameras even let you set multiple zones, each with different sensitivity settings. That way, the zone by your door can be high priority, while the living room couch gets a lower setting.
Why Motion Zones Matter
Before I started using zones, I got notifications every time a car passed by outside or my curtains fluttered in the breeze. Once I dialed in the zones, I only got alerts when someone actually walked into my home or passed the hallway motion zone.
This is especially useful if you have pets, ceiling fans, or live near a busy street. No more alerts every five minutes — only real movement in important areas.
Works on iPhone and Android
Whether you’re using an iPhone or Android, all the major camera apps make this easy. Ring, Wyze, Blink, Tapo, Eufy — I’ve used them all, and they all offer motion zone customization in just a few taps.
Some even let you name your zones (“Front Door,” “Nursery,” etc.) and set different types of alerts per zone. I set my front door to alert me with sound, but my kitchen only sends silent push notifications.
Use Zones with AI Detection
If your camera supports AI-based detection, motion zones become even more powerful. AI will filter motion by type — like “person,” “vehicle,” or “pet” — and combine it with your selected zone.
For example, my camera only alerts me when a person enters the “hallway zone,” not just any motion. That kind of control is priceless when you want security without the noise.
Final Thoughts
Setting up motion zones was one of the smartest things I did with my smart cam setup. Now I get relevant alerts, not random ones — and I’m not glued to my phone every time a leaf moves.
If you haven’t set yours up yet, take five minutes and do it today. Your future self will thank you.
One of the biggest benefits I noticed after using motion zones is how it reduced alert fatigue. Before I set them up, I was constantly checking notifications that turned out to be nothing. Now, I only get notified when someone steps into the exact areas I care about — no more wasted time or false alarms.
Another great trick is using zones during specific times of day. Some camera apps let you schedule motion alerts by time. I use high-sensitivity zones during the night when we’re asleep, and lower-sensitivity zones in the morning when the house is more active. That balance has really helped me sleep better without constant buzzing.
For parents, motion zones can be a game-changer. I created a zone over my baby’s crib, so I only get alerts when she stands up or moves around, not when someone walks through the hallway in the background. It makes nighttime monitoring way less stressful.
Pet owners also benefit a lot. I created zones that exclude the floor where my dog walks but include areas near the windows. That way, I get alerts if someone approaches the house — not every time my pet moves around. It’s pet-friendly security that actually works.
If you have large open spaces, I recommend using multiple small zones rather than one big one. This gives you finer control over detection and helps your camera process motion more accurately. I do this in my living room where there’s a lot going on.
Different apps have different styles of zone creation. Some let you draw custom shapes, while others use a grid layout. I personally prefer the shape-based method (like Wyze or Ring) because it lets me curve around windows or narrow spaces more precisely.
Don’t forget to adjust sensitivity settings along with zones. Even the best motion zones will trigger too often if your camera is set to high sensitivity. I usually test each zone by walking through it slowly and tweaking settings until I get the right balance.
If you’re using outdoor cameras, zones help reduce alerts from moving trees, headlights, or passing animals. I have a Blink Outdoor camera pointed at my driveway, and motion zones helped me filter out every car that passed by at night.
Some systems, like Eufy or Arlo, allow different actions per zone — for example, recording video in one zone but not another. This is super helpful if you want to conserve storage or only record when something enters high-risk areas.
Keep in mind that camera placement affects how well zones work. If your camera is angled too high or too far away, motion zones may not detect properly. I recommend testing your zones during setup by walking through each zone to see what gets triggered.
You can also use zones creatively — I’ve used mine as a virtual “tripwire” in front of a garage, so I know the moment someone steps into the driveway. Even budget cams like Tapo or Wyze can do this well if you place them right.
Finally, if your app supports event logs, review them weekly to see how your motion zones are working. I sometimes find I need to adjust a zone after reviewing old clips where someone was missed or detected outside the intended area.